Blog posts tagged with 'food'

Cheesecake hails from New York in modern times, but it turns out it has a history dating back to the 1st Century A.D and the politician Marcus Cato who served it as an offering to the gods at his temple. Later, it was served to the athletes during the first Olympic games in Greece, and then it was introduced in Western Europe by the Roman conquering armies.  

Knowing this bit of history will explain why my absolute favorite cheesecake can be found in Paris in a restaurant located in a small, historic passageway known as The Village Royal (Cité Berryer). For many years before the restaurant opened, I came to this quiet spot to drink tea and enjoy a bit of respite from the bustle of the city. It was like finding a small village in a big city and the fact that it was home to the Royal Guard of Louis XIII-- the Musketeers, definitely added to its charm. Now it has become my cheesecake pilgrimage when in Paris! Once seated at my table, they ask me if I would like to have a cheesecake set aside for my dessert... Perhaps I'm a bit too obvious?

I have asked for the recipe countless times --but alas, they only dribble clues about the ingredients-- the French, they are good at discretion! It seems speculoos cookies are what make the crust so good and that they leave the cake a bit undercooked (the center is runny when you bite into it), the key to its ultimate success.  I hope you travel to the Village Royal-- besides the cheesecake, Chanel and Dior have moved into the Village making it the perfect afternoon outing!  
http://villageroyal.com/?lang=en#!/history
In the spirit of sharing, I give you my recipe and quote the motto of the Three Musketeers:

"All for one and one for all"!
 

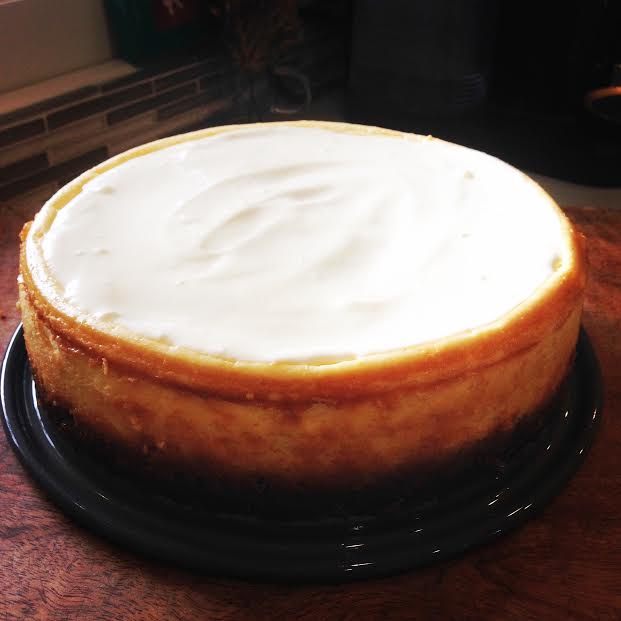
CARLA'S CHEESECAKE INSPIRED BY Le Village

Crust:


2- 7 ounce boxes of Speculoos cookies (Trader Joe's)
1 stick (8 Tablespoons) butter, melted
1/2 cup  brown sugar

Cheesecake:

3 large 8 oz. boxes organic  cream cheese, room temperature
1 cup organic sour cream 
1 1/2 cups granulated sugar
5 large organic eggs, room temperature
1 teaspoon vanilla extract
1 teaspoon lemon juice

Heat oven to 350. Coat bottom and sides of a 9-inch springform pan with butter.

In a food processor, finely crumble the cookies . Process for 1 minute and transfer to a bowl.  Drizzle butter over the mixture, add brown sugar, and use a fork to mix until well moistened. Put crumbs into the pan, spread and press them into an even, lightly packed layer. Bake 10 minutes and remove from oven to cool.

Now preheat the oven to 500 degrees

Beat cream cheese and 1 cup sour cream until fluffy about 3 minutes.  With mixer going, add sugar in a steady stream until well mixed. Whisk together eggs, vanilla and lemon juice and add to cream cheese mixture. Beat until very smooth. Pour it over the crust and smooth the top. Bake for 10 minutes at 500 degrees,  then lower the temperature to 200 degrees and bake for another 1 hour and 15 min.

Remove from oven and cool.  While cooling, mix 2 cups sour cream with 1/4 cup sugar (add more sugar if you like it sweet).  When the cake is cool, spread the sour cream mixture over the top (like icing) and place in fridge.  Cover and let it sit for at least 4 hours in fridge. When ready to serve, slide a knife around the outer edge of cake in the pan and then remove the side of the springform pan.  Enjoy!

xx Carla 


I was born in the spring of the late 1950's.  Ventura was a quiet southern California beach town then and our lifestyle was a modest one. I grew up feeling that I had everything I needed-- especially so on Sunday nights-- deemed pie night,  in our home.  The anticipation of knowing what pies my mother Dorothy and family friend, Marion would make was my favorite guessing game. Life was simpler then!  


My mom made everything from scratch; her pies, our meals and our clothes.... it seemed effortless! I know now that it wasn't but it certainly gave me a sense that everthing was possible if I applied myself. To this day, I get a thrill when I make something from nothing. Whether it be a necklace made from unlikely combinations of found parts or a recipe recreated with whatever is leftover in the refrigerator, a bit of imagination and time can produce something special.  I find there to be a bit of magic in all of this! 


CARLA'S FLAKY PIE CRUST

This is a crust I make in a food processor. It’s easy and pretty foolproof!  On Sunday Pie Night, I learned that the secret to a good crust is to have everything very cold and to handle it as little as possible.

Ingredients for one  9" pie crust
1 1/2 cups all-purpose flour or Cup4Cup Gluten free flour
1 1/2 sticks cold butter, cubed
1/4 teaspoon salt
1/3 cup  ICE water

 Measure the flour into the processor with the regular blade attached. Add the unsalted butter, cut into cubes (should be frozen or very cold). Add salt. Process for 5 seconds. (the butter should still be in pieces)

Add the ice water and process for 5 seconds longer, just until dough comes together. Don’t wait until it is a big clump or it will be too wet and tough.

 Remove the dough and gather it into a ball with your hands (squeeze it a bit to make it stick together). Place a piece of wax paper (lightly dust it with flour and lightly flour your rolling pin) over a wood board or clean surface and roll the dough into a 16-18 inch circle to 1/16-1/8 inch thick. Place this dough (on the wax paper) into the fridge for about 20 minutes maximum. When you are ready to put it in your pie dish, place the pie dish on top of the dough, turn it over and then gently peel the wax paper off the dough .  Pat it gently into the pie dish and crimp the edges.

Note: If you find yourself without a proper rolling pin, I find that a chilled vodka bottle will do the trick just fine!  A quick shot before rolling out the dough is known to boost confidence!


xx Carla


camillek logo


CAMILLE K is most definitely a jewelry brand so why a post about food?  If you follow us on Instagram, you will see frequent photos of food and the #cookingwithcarla hashtag.  Some of you have asked for the recipes and we have listened!


Cooking is a creative process -- especially so when you are willing to NOT follow the recipe and trust your instincts.  In the same vein of knowing what gem colors go together when I'm designing a new piece of jewelry, deciding what spices will complement a recipe I'm working on requires a similar sensibility.  And of course, there is the visual aspect of designing and cooking that is so appealing to me.  Jewelry tries to capture the wearer's interest with both beauty and comfort. Food attracts the eye of the diner and delights his/her palate.  Both should make every effort to stir  one's heart! 
   
I hope you will enjoy preparing and sampling some of my personal favorite recipes both sweet and savory!  If you know me, you know I love a good story. Here are Kate's three rules to live by for you to ponder as you bite into your first brownie: 

 
1- Never quit!
2- Be yourself!
3- Don't put too much flour in your brownies!
 
KATE'S BROWNIE RECIPE
 
1) Preheat oven to 325 degrees
2) In a heavy saucepan over very low heat, melt 2 squares  Guittard unsweetened chocolate and 8 Tbsp. organic butter.
3) Remove pan from heat and stir in 3/4 cup sugar. ( I often change to honey)
4) Beat in 2 organic eggs and 1/2 tsp. vanilla
5) Quickly stir in 1/4 cup flour (I use Cup4Cup gluten free flour), and 1/4 tsp. salt
6) Spread batter in a well-greased 8x8" baking pan. Bake 40 minutes. Remove, cool, cut and be delighted!
 
 
 XX Carla